
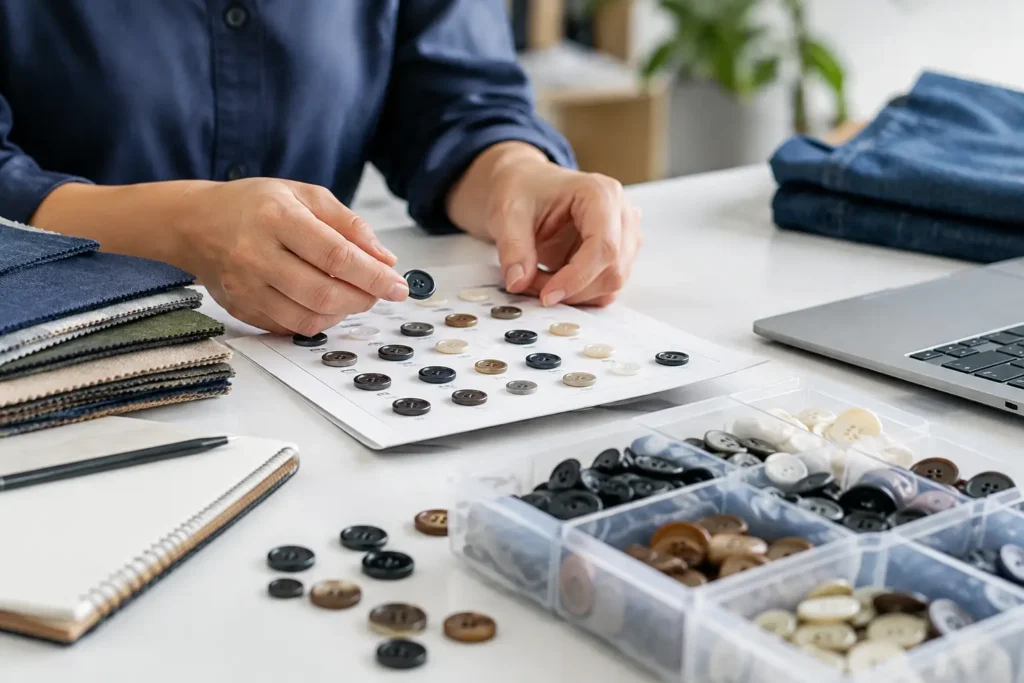
A button can be visually correct in a tech pack and still fail the production brief. The button sourcing process needs to establish more than material and appearance: it must confirm construction, attachment method, color tolerance, logo detail, order quantity, approval controls, and delivery requirements before bulk production is released. For apparel teams, early specification work is usually less expensive than correcting a trim issue after garments are sewn.
Start With a Production-Ready Button Brief
A visual reference is useful, but it is not a complete sourcing specification. A photograph, mood board, or digital rendering may communicate the intended look while leaving open questions that affect feasibility, cost, lead time, and consistency. The first task is to convert the design direction into a brief a manufacturer can assess.
Specify the intended button material or acceptable material options. Corozo, resin, metal, horn, shell, wood, ceramic, and recycled-content materials can create very different visual and tactile results. They also respond differently to dyeing, polishing, engraving, washing, dry cleaning, heat, and contact with garment finishes. A similar-looking material may be easier to source or process, but it should not be substituted without reviewing how the change affects the garment and brand intent.
The brief should also state the button size in millimeters or Ligne, thickness, hole count, shank or sew-through construction, edge profile, back finish, and required quantity by style, color, and size. If the garment uses several button sizes, identify each position clearly. A front placket button, cuff button, waistband button, and pocket button may require related but separate specifications.
For branded buttons, provide the logo artwork in a usable vector format where possible. Clarify whether the mark is engraved, debossed, embossed, laser-marked, printed, or formed as part of the tooling. Fine lines and small lettering can lose definition at small diameters, particularly on textured natural materials. The most attractive logo treatment on a large showroom sample may not be suitable for a small cuff button.
Evaluate Material and Construction Together
Material selection should begin with the garment’s use, not only its color story. A tailored jacket, denim program, resort shirt, uniform, knitwear piece, and outerwear style can place different demands on the same button design. The construction and finishing route need to suit those conditions.
Natural materials such as corozo, horn, shell, and wood have variation that contributes to their character. That variation can include grain, tone, texture, or surface pattern. Teams should decide whether this natural variation is desirable, acceptable within a defined tolerance, or unsuitable for the program. A resin button may offer more controlled color and repeatability, while a natural-material button may deliver a less uniform appearance by design.
Metal buttons require attention to base material, finish, fastening construction, and interaction with the garment. A two-part tack button is specified differently from a sew-through metal button or a shank button. The receiving factory also needs to confirm how the button will be attached and whether the garment construction supports that method.
Color should be treated as a physical approval point. A Pantone reference can guide development, but the achievable result depends on the button material, surface finish, opacity, texture, and production method. Gloss, matte, pearlized, marbled, transparent, and dyed natural materials can all shift the perceived color. For this reason, a physical color standard or approved button sample is more reliable than relying on a screen image alone.
Build Sampling Into the Button Sourcing Process
Sampling is where a concept becomes a manufacturing decision. The sample stage should verify the details that cannot be judged reliably from drawings: hand feel, edge smoothness, hole shape, back profile, logo legibility, finish consistency, and the relationship between the button and garment fabric.
A first sample may be intended to review form and material direction rather than serve as a final approval standard. This distinction matters. If tooling, custom color development, or an uncommon finish is required, the initial sample can reveal whether the selected route produces the desired result before the team commits to bulk production.
When reviewing samples, assess them in the context of the garment whenever possible. Place the button against the actual fabric, thread, lining, and adjacent trims. Check whether the button can be sewn efficiently, whether its scale is correct for the buttonhole, and whether the color appears different under relevant lighting. For coated, washed, or dyed garments, the garment processing sequence should be discussed early because it may affect the trim or require the button to be attached after a specific operation.
An approval record should identify the exact sample being approved, including material, size, color, finish, logo version, and construction. A general statement such as “approved button” leaves too much room for interpretation when several versions were reviewed. Keep approved samples or clearly documented reference images available to the brand, garment factory, and button supplier.
Confirm MOQ, Tooling, and Lead-Time Dependencies
MOQ is not a single universal number for custom buttons. It can vary according to material, size, color development, logo tooling, finish, and the number of separate stock-keeping units in the order. A style with three sizes and two colors is not the same production request as one button design in one finish, even if the total unit quantity is similar.
Tooling should be discussed when the button needs a custom shape, specific face detail, proprietary logo relief, or specialized construction. Some projects can use existing forms with customized color or decoration. Others require new tooling to achieve the intended profile. The right question is not simply whether tooling is needed, but what visual or functional requirement makes it necessary and whether that requirement is commercially justified for the program volume.
Lead time also depends on the development route. Material availability, color matching, tooling, sample approvals, bulk scheduling, inspection, packing requirements, and shipping planning can each affect the timeline. A supplier can only assess a workable schedule after receiving the key specifications and expected order timing. Leaving button selection until garment production is already underway creates avoidable pressure on every later decision.
Set Clear Quality Review Points Before Bulk Release
Quality review should focus on agreed characteristics that can be checked consistently. These may include size range, thickness, hole position, shank alignment, finish appearance, logo placement, color reference, and packing count. The acceptable tolerance depends on the material and design. A high-gloss resin button and a naturally varied corozo button should not be assessed by identical appearance criteria.
Performance requirements should be raised before sampling, especially for workwear, uniforms, children’s apparel, outerwear, or garments expected to undergo repeated laundering or specialized care. The applicable test approach, sample requirement, performance target, and any documentation needed should be confirmed for the exact material, construction, garment use, and supply route. Assumptions based on a similar button are not enough.
Packaging deserves attention as well. Buttons can be supplied loose, counted, bagged, or packed to support factory line handling. If the garment factory needs buttons separated by size, color, or style, state this in the purchase requirements. Clear carton marking and packing instructions help prevent trim mix-ups during garment assembly.
Coordinate the Supplier, Brand, and Garment Factory
The strongest sourcing process creates one shared version of the specification. The brand or product team defines the aesthetic and commercial intent. The button manufacturer reviews feasibility and develops samples. The garment factory confirms sewing, attachment, and line-use requirements. Purchasing coordinates quantity, delivery destination, and approval timing.
NZXTRIM supports this process by reviewing custom button briefs across material, construction, logo method, physical sampling, and bulk-production requirements. For international programs, delivery planning should account for the factory’s required receipt date rather than only the garment ex-factory date. Buttons need to arrive early enough for incoming inspection, line preparation, and any replacement process if an issue is found.
A well-run button project does not depend on a supplier guessing what a reference image means. It gives every party a clear approved standard and enough time to make sound production decisions. Start with the garment’s real use, document what must be controlled, and treat the physical sample as the point where design intent becomes a repeatable trim specification.