
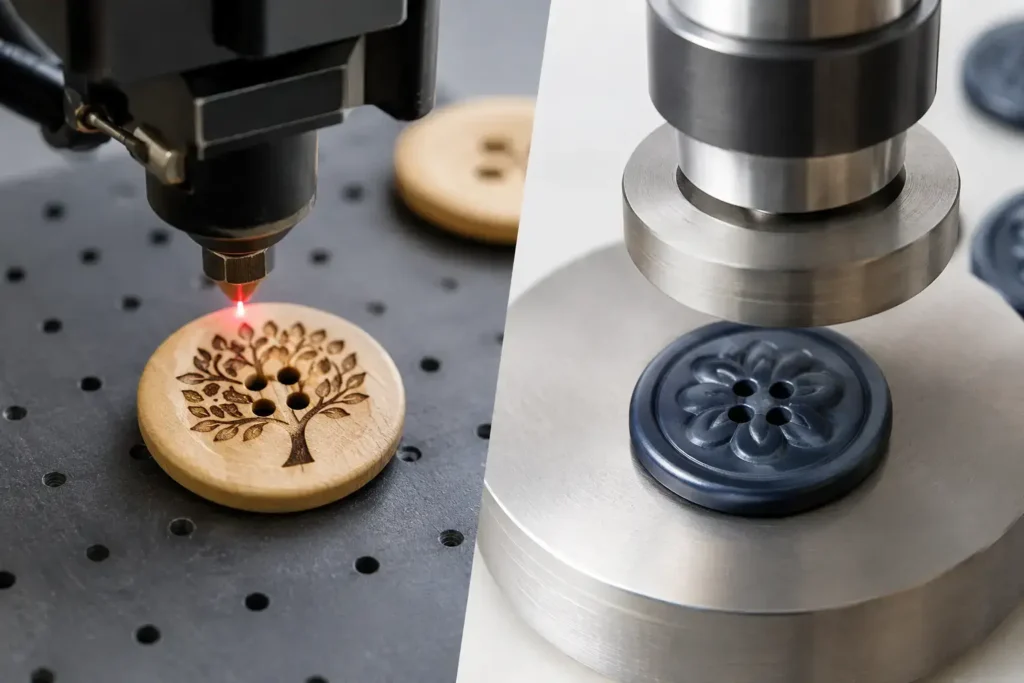
A button logo that looks clear in a digital drawing can become weak, shallow, or inconsistent once it is translated into a specific material and production method. For garment developers choosing laser engraving versus embossing, the practical question is not which process is better in general. It is which process will produce the required appearance, legibility, hand feel, and repeatability on the selected button material and construction.
Laser engraving creates a mark by removing or changing the surface with a focused laser. Embossing creates a raised design through molding, pressing, or a dedicated forming tool, depending on the button material and manufacturing route. Both can work well for custom clothing buttons, but they create fundamentally different results and require different decisions before bulk production.
Laser Engraving Versus Embossing: The Production Difference
Laser engraving is usually specified when a brand needs fine linework, small lettering, variable artwork, or a logo applied after the base button has been made. The laser follows digital artwork, so changes to a logo file can often be assessed without changing the base button shape. On suitable materials, it can produce crisp lettering, fine icons, serial references, or controlled decorative patterns.
The engraved result is normally recessed, surface-etched, or visibly altered by heat. Its appearance depends on the contrast created between the marked area and the surrounding button. A dark laser mark on light wood, horn, shell, or certain resin surfaces may be highly visible. On other materials, the mark may be subtle, tonal, or inconsistent across natural variation. A laser mark should therefore be reviewed on physical material, not approved only from a screen image.
Embossing produces a raised logo or pattern. On molded resin, ceramic, corozo, and similar button types, this may be formed as part of the button face. On metal buttons, the raised detail may be created through stamping, casting, or another construction-specific process. The result is tactile and dimensional, making embossing useful when the brand wants a logo that can be recognized by touch as well as sight.
Because embossing changes the physical form of the button face, it usually relies on tooling or a production-forming method. That adds an upfront development decision, but it can be appropriate for programs requiring a stable, repeatable identity across a substantial production run. The exact tooling requirement, cost structure, and development timing depend on button size, material, construction, artwork depth, and order quantity.
Choose Based on the Button Material First
Material is often the deciding factor. A logo method that performs well on a coated metal button may not be appropriate for a natural horn or shell button. Before selecting a decoration route, the product team should confirm the button substrate, surface finish, color, and expected garment use.
Laser engraving can be effective on wood, horn, shell, corozo, resin, selected recycled-content materials, and some coated or finished metal buttons. Yet natural materials require realistic expectations. Grain direction in wood, density variation in horn, and natural layers in shell can change the shade and sharpness of a laser mark from one button to another. This variation may support a natural-material aesthetic, but it may not suit a program requiring uniform logo contrast.
For resin and other molded materials, laser results depend on pigment, filler, surface texture, and finish. A matte face may read differently from a polished face. Dark colors can also limit visible contrast unless the laser produces a sufficiently distinct mark. Pantone color development should be considered alongside logo visibility, rather than treated as a separate decision.
Embossing is especially suitable for molded buttons because the logo can be integrated into the face design. It can also work effectively on metal where the selected construction supports raised relief. The material must be able to reproduce the relief cleanly without softening small details, cracking at narrow points, or causing an impractical face profile.
For both methods, the button’s size matters. A 15 Ligne button provides far less usable face area than a 30 Ligne button. Fine lettering that is readable at a large scale may fill in during embossing or become visually crowded when laser engraved on a smaller button. The logo should be simplified for the actual button diameter, not merely reduced from an existing garment label or packaging file.
Detail, Depth, and Visual Character
Laser engraving generally favors precision over dimensionality. It is a strong option for narrow letterforms, small marks, and graphic linework where the design needs a controlled edge. However, very fine details can still be affected by material grain, surface curvature, laser settings, and the scale of the button face.
Embossing favors relief and presence. A raised monogram, crest, border, or repeat pattern can make the button feel more integral to the garment design. The trade-off is that very small internal spaces and thin lines may not reproduce cleanly. Artwork often needs to be adjusted by increasing stroke weight, opening enclosed areas, or reducing the number of fine elements.
Do not confuse embossing with debossing. Embossed detail sits above the surface, while debossed detail is pressed or formed below it. A brand may initially ask for embossing when the reference image actually shows a recessed mark. That distinction affects tooling, light reflection, tactile feel, and how the design holds up visually after laundering and wear.
A raised logo also changes the button’s topography. On outerwear, denim, uniforms, or workwear, that may be a deliberate design feature. On shirts or garments where the button sits close to the body, a lower-profile construction may be preferred. The closure position, garment weight, and intended wearer experience should be part of the specification.
Tooling, Sampling, and Changes After Approval
Laser engraving can offer more flexibility during logo development because the mark is based on a digital file. This does not eliminate sampling. It simply means that some artwork adjustments may be evaluated without rebuilding a molding or stamping tool. It can be useful for capsule collections, brand refreshes, or programs where the base button remains unchanged while logo artwork varies.
Embossing generally requires earlier artwork discipline. Once a relief design is built into a tool or production form, changes may require tool revision or new tooling. That makes it especially important to approve vector artwork, face dimensions, logo placement, relief height, and edge treatment before proceeding.
For either method, a production-ready specification should identify the button material, size in millimeters or Ligne, construction, hole or shank type, base color, logo artwork, logo location, finish, and reference sample requirements. It should also state whether the approved sample is intended to represent color, logo definition, surface appearance, or all of these characteristics. A concept rendering is useful for direction, but it is not a reliable substitute for a physical sample.
NZXTRIM can review these details with the selected button material and advise whether the requested artwork needs adjustment for manufacturability. MOQ, sample timing, bulk timing, testing scope, and any material-related performance requirements should be confirmed for the individual project rather than assumed from a previous button program.
Durability Depends on Construction, Not the Logo Method Alone
Neither laser engraving nor embossing should be treated as automatically more durable. The relevant question is how the marked or raised area performs on the specific material, finish, garment category, and care requirement.
A laser mark may remain visually stable when it is sufficiently deep or contrasting for the substrate, but an extremely light surface mark can become less distinct after repeated abrasion. An embossed mark may retain its shape well, while high raised points can be more exposed to rubbing, impact, or finish wear depending on the construction. Metal coatings, resin finishes, natural-material sealing, and garment washing conditions can all affect the final result.
For programs with defined laundering, dry-cleaning, abrasion, corrosion, or restricted-substance requirements, the relevant testing and certification scope must be confirmed for the exact button material, finish, order, and supply route. A similar-looking button in a different finish is not automatically equivalent.
A Better Brief Produces a Better Button
The most useful next step is to send the logo artwork together with the intended button size, material preference, base color, garment application, and a reference for the desired logo effect. If the goal is fine graphic detail and artwork flexibility, laser engraving may be the practical route. If the goal is a raised, tactile brand element integrated into the button face, embossing may be the stronger choice. A physical sample will show where that decision becomes real: in the way the mark reads under light, against fabric, and across a production-ready button.