
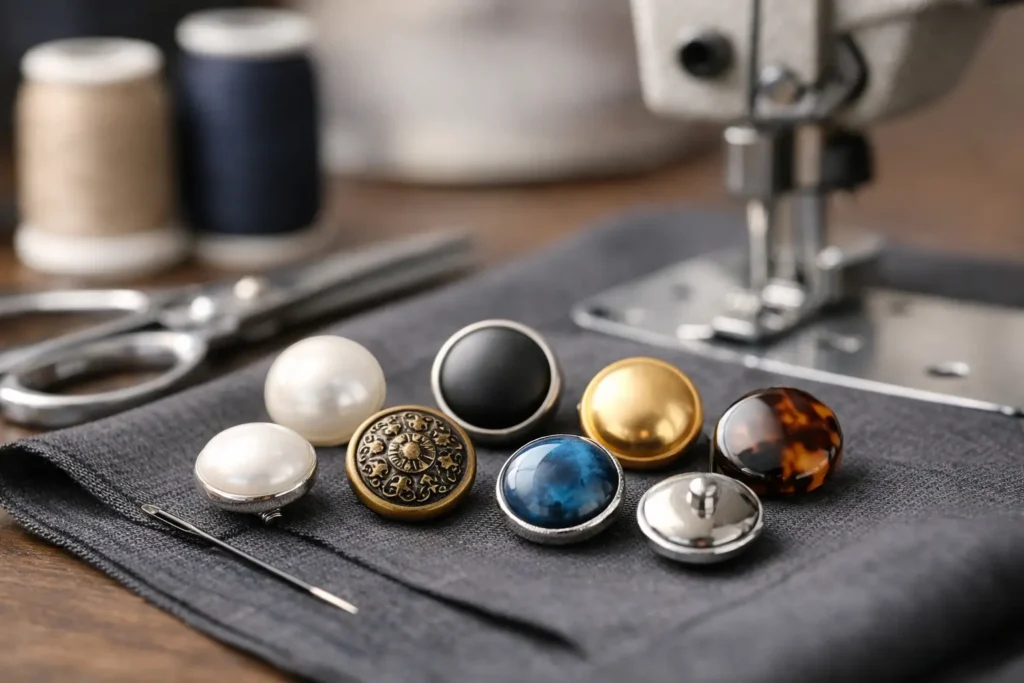
A shank button can change the way a garment hangs, closes, and is perceived before the wearer notices a seam. For custom shank buttons apparel programs, that small raised loop on the back creates space between the button face and the fabric, making it especially useful for heavier materials, dimensional garments, and designs where the button itself should remain the visual focus.
Unlike a sew-through button, a shank button is attached through an integrated back loop rather than holes in the face. This construction gives designers more freedom with logos, textures, stone-like finishes, metal details, and rounded forms. It also introduces production decisions that must be resolved early: shank height, attachment strength, button weight, sewing method, and garment compatibility.
For apparel brands and garment manufacturers, the best result comes from treating the button as a functional trim, not a late-stage decoration. A well-developed custom shank button should support the intended garment use, preserve its appearance through wear and cleaning, and remain consistent across bulk production.
What Custom Shank Buttons Do for Apparel
Shank buttons are commonly used on coats, blazers, knitwear, uniforms, dresses, denim outerwear, leather goods, and premium fashion garments. The elevated attachment point helps a button sit properly over thicker plackets, padded layers, or textured fabrics. It can also reduce the distortion that sometimes occurs when a flat button is sewn tightly against a bulky garment.
The visible face is uninterrupted by sewing holes. That matters when a brand wants an embossed logo, a polished metal surface, a ceramic-style glaze, a marbled resin effect, or a sculptural profile. On a tailored jacket, for example, a logo button with a clean face can carry more visual value than a standard four-hole design.
However, shank buttons are not automatically the right choice for every style. Lightweight shirting, children’s apparel, and high-friction workwear may require a flatter, lighter, or more securely anchored button construction. The correct decision depends on fabric weight, opening tension, laundering requirements, garment use, and the desired retail position.
The shank is a performance feature
The shank must be sized for the garment, not only for the button diameter. A shank that is too short may pull tightly against a thick wool coating or quilted placket, making the closure difficult to use. A shank that is too high can allow the button to tilt, snag, or feel unstable during wear.
Attachment strength is equally important. Metal shanks may be cast, welded, or mechanically integrated depending on the button material and design. For resin, polyester, corozo, horn, or composite buttons, the shank construction must be evaluated for pull resistance and repeated fastening. A visually attractive sample is not sufficient if the loop weakens under production-use conditions.
Choosing Materials for Custom Shank Buttons
Material selection shapes more than appearance. It affects mold options, surface detail, weight, durability, minimum order quantity, cost, and production timing. The starting point should be the garment’s function and target market, followed by the desired visual direction.
Resin and polyester are practical choices for brands seeking broad color control, custom shapes, embedded effects, and efficient bulk production. They can be developed in solid colors, transparent tones, pearlescent looks, tortoiseshell patterns, and imitation natural materials. These options are well suited to fashion collections that need accurate color matching or repeated seasonal production.
Corozo offers a natural, refined character with organic grain and a premium hand feel. It is frequently selected for tailored clothing, sustainable-minded collections, and elevated casualwear. Because it is a natural material, slight variation is part of its appeal, but brands should define how much variation is acceptable before bulk approval.
Metal shank buttons provide weight, shine, dimensional detail, and strong branding potential. They are widely used for blazers, uniforms, outerwear, denim, and luxury accessories. Plating selection requires careful planning, particularly for garments exposed to moisture, salt, abrasion, dry cleaning, or industrial laundering. Antique finishes, matte coatings, polished surfaces, and enamel color fills can all create distinct results, but each finish should be tested against the end use.
Ceramic, horn, recycled materials, and specialty composites can provide a more distinctive story. These materials may require additional development time or have tighter limits on shape, color consistency, and production tolerance. That is not a disadvantage when the material supports the collection concept, but it should be considered before a delivery date is committed.
Specify the Button Before Sampling
A clear specification reduces sampling revisions and helps a button factory quote accurately. A reference image is useful, but it rarely provides all the technical information needed for repeatable OEM production. The strongest development packages combine design intent with measurable requirements.
Start with the button diameter in millimeters and confirm the finished garment placement. Then define thickness, face profile, shank inside diameter, shank height, material, color standard, surface finish, logo artwork, and any required plating or coating. If the button includes a logo, provide clean vector artwork and indicate whether the mark should be raised, recessed, laser engraved, printed, or filled with color.
The garment fabric should be part of the sample review. A 20 mm button can look balanced on a wool coat but oversized on a lightweight cardigan. Likewise, a heavy metal button may improve the appearance of a structured jacket while pulling on a soft knit. Testing the button on the actual placket reveals issues that cannot be seen when it is reviewed loose in a sample box.
For matching programs, use approved color standards whenever possible. Physical swatches, Pantone references, and sealed samples help define expectations, though material type can affect the final appearance. A color that looks accurate in resin may appear different in corozo, horn, or plated metal because light reflects from each surface differently.
Confirm the sewing and care method
The garment factory should confirm thread size, stitch method, button spacing, and any reinforcement required behind the placket. A shank button is only as secure as the combined button-and-sewing system. For heavier buttons, a backing button, stay tape, or reinforced fabric area may be needed.
Care requirements should be established before final approval. Dry cleaning, home washing, enzyme washing, stone washing, high-temperature pressing, and industrial laundry can produce very different results. If the garment will be garment dyed or washed after button attachment, the button material and finish must be selected for that process rather than added afterward as an assumption.
Sampling That Prevents Bulk Problems
Sampling is where design ambition meets production reality. A development sample should be used to assess shape, logo clarity, color, finish, shank construction, and garment compatibility. It should not be treated as a simple visual approval.
For complex buttons, more than one sample stage may be appropriate. The first stage can confirm mold design and overall proportion. A second stage can refine plating, color, engraving depth, or surface texture. The pre-production sample should represent the approved bulk method as closely as possible, including the specified material, finish, and assembly approach.
Clear approval records matter. Brands should retain an approved button sample or limit sample and document the accepted dimensions, color range, finish standard, and test requirements. This gives the buyer, garment factory, and button manufacturer one reference point when questions arise during production.
NZXTRIM supports this process from design review and material selection through prototype development, bulk manufacturing, and delivery coordination. For buyers managing multiple garment factories or seasonal programs, that continuity helps keep trim specifications consistent across orders.
Quality Control for Shank Button Production
Bulk consistency depends on controls that go beyond a final visual inspection. The factory should monitor incoming materials, mold accuracy, dimensions, logo definition, color or plating consistency, shank attachment, surface defects, and packing counts throughout production.
For metal buttons, common checks include plating appearance, sharp edges, corrosion resistance where required, and pull strength of the shank. For resin and natural-material buttons, inspection may focus on color variation, cracks, bubbles, surface marks, mold lines, and shank integrity. The acceptable standard should reflect the product category. A natural corozo button may allow controlled grain variation, while a polished uniform button may require much tighter consistency.
Packaging also deserves attention. Polished or plated button faces can scratch if loosely packed. Individually protected layers, compartment trays, or appropriate bulk packing methods help preserve the approved finish through shipping and garment assembly.
Plan Lead Times Around Development Decisions
Custom molds, specialty materials, complex logos, and finish testing all add time. The most efficient sourcing approach is to begin button development when garment silhouettes and fabrics are sufficiently stable, rather than waiting until final production booking. Early development allows time for a corrected sample without putting the garment launch at risk.
MOQ should be discussed in the same conversation as design complexity. A simple standard-size resin button may be practical at lower quantities, while a newly tooled metal button with custom plating may require a larger order to make the development cost economical. If quantities are limited, adapting an existing base shape while customizing the logo, color, or finish can be a sensible compromise.
A useful final step is to submit a complete button brief with the garment fabric, use case, target quantity, required delivery date, and approved visual references. That gives a manufacturing partner the information needed to recommend the right material, shank construction, sampling route, and production plan before a small trim decision becomes a bulk-production problem.