
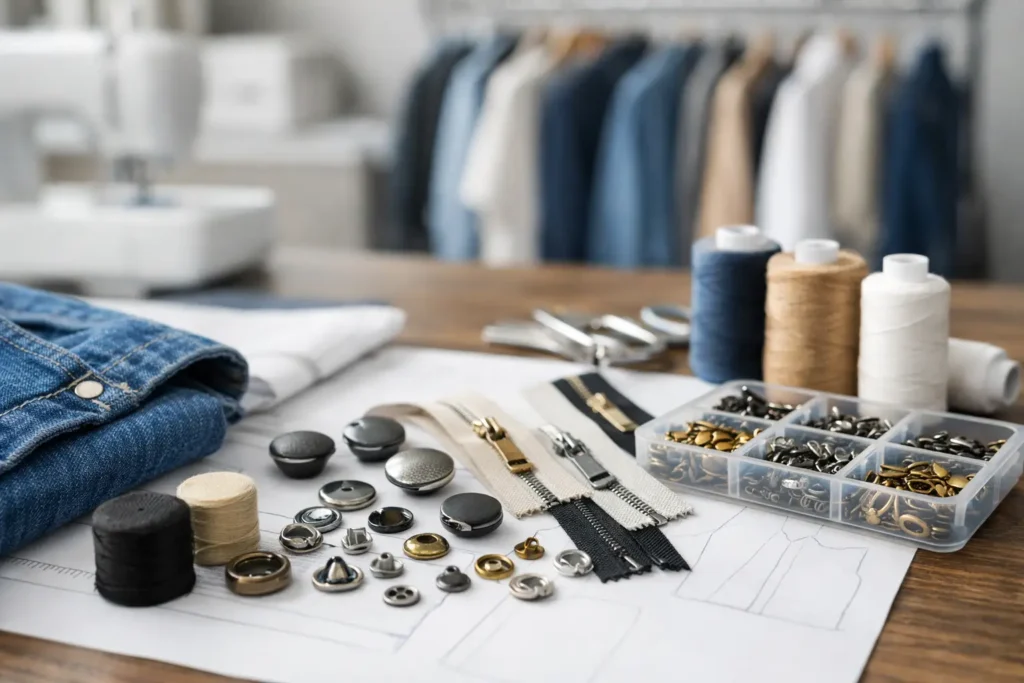
A fastener that looks correct on a garment sketch can still fail as a production decision. The issue is usually not the idea itself. It is the missing detail between a visual reference and an approved component that can be manufactured repeatedly. This apparel fastener sourcing guide focuses on how apparel teams can close that gap before bulk production is scheduled.
For most garment programs, fastener sourcing is a balance of appearance, garment function, material behavior, cost structure, and delivery timing. Buttons may be the primary visual trim on a shirt, coat, uniform, or knitwear program, while zippers, snaps, hooks, labels, and emblems may serve more functional or identification-led roles. Each category needs a clear specification, but the same sourcing principle applies: approve the actual production standard, not only a digital concept.
Start the Apparel Fastener Sourcing Guide With the Garment
The garment should determine the fastener brief. A lightweight rayon blouse, a structured wool coat, denim workwear, and a children’s outerwear program can all use buttons, but they require different material, attachment, weight, and durability considerations.
Start with the garment’s fabric composition, thickness, wash process, intended use, and construction. Then define where each fastener will sit and what it must do. A four-hole button at a front placket behaves differently from a shank button on a heavy overcoat. A decorative metal button may be suitable for a jacket front but impractical for a soft knit where weight and pull-through risk need closer review.
It also helps to separate essential fasteners from decorative trims early. A closure component needs construction details that support repeated use. A decorative button can allow more freedom in shape, finish, or logo treatment, provided it remains compatible with the sewing operation and garment care process.
Define the Size in Millimeters and Ligne
Button size is often discussed in Ligne, but purchase specifications should also include millimeters. One Ligne equals 0.635 mm. Using both units reduces avoidable interpretation errors between design, sourcing, factory, and trim supplier teams.
Do not specify only “large,” “medium,” or “shirt button.” Record the target diameter, permitted dimensional tolerance, thickness or profile, and hole or shank construction. For shaped buttons, provide the maximum dimensions and indicate the orientation required on the garment. A 20L button may be familiar shorthand, but it does not define thickness, edge shape, hole diameter, or finish.
Choose Material for the Actual Program
Material selection should begin with the intended visual result, then be checked against production realities. Corozo can provide a natural, refined surface with visible variation. Resin offers broad color and shape flexibility. Metal can create a sharper, more substantial look, while shell, horn, wood, ceramic, and recycled-material options each have their own surface character and processing limitations.
No material is universally better. A dyed natural material may show more tonal variation than a molded resin button. A highly polished metal finish can emphasize scratches or handling marks more readily than a matte finish. Ceramic may suit a distinctive premium concept but needs careful consideration of shape, attachment, and garment use. Recycled-content claims, material origin statements, and color consistency expectations should be confirmed for the exact material selection and order route rather than assumed from a general category name.
Where a brand has a target reference, send a physical swatch, existing button, or approved color chip whenever possible. Screen images and uncoated printouts are useful for direction, but they are not reliable production color standards.
Match Construction to Sewing and Use
The construction of a button affects both its appearance and how the garment factory handles it. Common choices include two-hole, four-hole, and shank constructions. Hole buttons are generally practical for standard sewing operations and can suit many shirt, trouser, and uniform programs. Shank buttons conceal the stitch and can give a more formal or dimensional appearance, but shank geometry must work with the fabric thickness and sewing method.
Specify hole count, hole diameter, spacing, shank height, back profile, and required thread clearance. These small details influence whether a button sits flat, rotates excessively, or creates tension at the closure. If the garment uses a keyhole buttonhole, a thick placket, or a heavy lining, the button construction should be assessed with the completed garment layers rather than the face fabric alone.
Turn the Design Into a Production Specification
A mood board is not a specification. It can communicate style, but it rarely contains enough information to quote, sample, and reproduce a fastener consistently. Before requesting a quotation or development sample, organize the component information into one usable brief.
For a custom button, the brief should identify the material, size, construction, color reference, quantity by size and color, logo artwork, finish, and delivery requirement. It should also state whether the design uses an existing shape or requires new tooling. If an existing sample is being matched, identify which features are mandatory and which are only visual references.
Logo instruction needs particular care. Engraved, debossed, embossed, laser-marked, printed, and cast logo treatments create different results depending on material and button size. Fine artwork that is readable on a 30 mm metal button may not reproduce cleanly on a small shirt button. Provide vector artwork where available, specify logo placement and orientation, and allow the supplier to review line weight and detail before development begins.
Tooling Is a Commercial and Timing Decision
Custom shapes, unique profiles, raised logos, and certain metal constructions can require tooling. Tooling can improve repeatability for a defined design, but it adds development steps and should be approved before bulk planning is locked.
Ask whether the proposed design can use an existing mold or whether a new tool is required. If new tooling is needed, confirm the approval sequence: artwork review, technical drawing or digital visualization where applicable, physical sample, and bulk release. A visual rendering can help assess proportion and logo placement, but it should not be treated as final evidence of material texture, plating tone, or finished production appearance.
Use Sampling to Resolve Risk, Not Just Approve Appearance
A physical sample is the point where the design becomes tangible. It allows the product team to assess proportion, color, edge finish, logo clarity, attachment construction, and interaction with the garment fabric. Sampling is especially valuable when the button uses a new material, a custom dye, a nonstandard finish, or a logo detail close to the limits of the component size.
Sample review should happen alongside the garment whenever timing permits. Place the button on the intended placket, pocket, cuff, waistband, or front closure. View it under the light conditions used for product review, but also assess whether it catches, tilts, feels overly heavy, or interferes with the garment silhouette.
If changes are needed, document them in one consolidated revision. Separate comments from different stakeholders often create conflicting instructions, such as requesting a deeper logo and a smoother surface while retaining the same shallow profile. A single approved reference sample, linked to a clear specification, gives the bulk order a practical control point.
Plan MOQ and Lead Time Around the Full Component Set
MOQ is not simply a number assigned to a product category. It can vary by material, color, size, tooling requirement, finish, and order mix. A program using several button sizes in one color may have different production conditions from a single-size order. Small runs with custom metal plating, special molded colors, or uncommon materials may require a different approach from repeat styles using established specifications.
Lead time also begins before bulk production. Artwork clarification, material availability, color development, tooling, sample review, and revision cycles all affect the calendar. For seasonal launches, work backward from the garment factory’s trim-needed date rather than from the final shipment date. The fastener must arrive early enough for sewing, in-line review, packing, and any planned production buffer.
For global programs, delivery planning should identify the destination, shipment method, carton labeling needs, and whether trims will be sent directly to the garment factory or consolidated with other materials. NZXTRIM coordinates custom button projects from Hong Kong with production support in China, while project feasibility, order conditions, and delivery planning are reviewed against the specific requirement.
Keep Quality Control Focused on Approved Details
The most useful quality review points are the details the team approved during development. For buttons, this commonly includes size, thickness, color range, finish, logo placement, hole or shank construction, surface condition, and packing count. For zippers, labels, and emblems, the relevant checkpoints differ, but the same discipline applies: define the approved standard before bulk output begins.
Avoid relying on broad instructions such as “premium finish” or “match sample.” State what must match. For example, identify whether a metal button should have a brushed face with polished edge, whether the back must remain unbranded, or whether natural material variation is acceptable within the approved reference range. Clear acceptance language helps prevent a supplier from guessing what the design team considers material variation versus a defect.
Build a Sourcing Brief That Can Travel Across Teams
The strongest fastener brief can move from designer to developer, buyer, supplier, and garment factory without being rewritten. It should pair visual direction with measurable information and preserve the final approved sample as the working reference.
When a component is central to the garment’s identity, give it development time equal to its importance. A button may be physically small, but its material, construction, and finish can change the perceived quality of an entire garment. The practical next step is to gather the fabric swatch, artwork, target quantities, and required delivery date before requesting development, so the sourcing discussion starts with decisions that can actually be produced.