
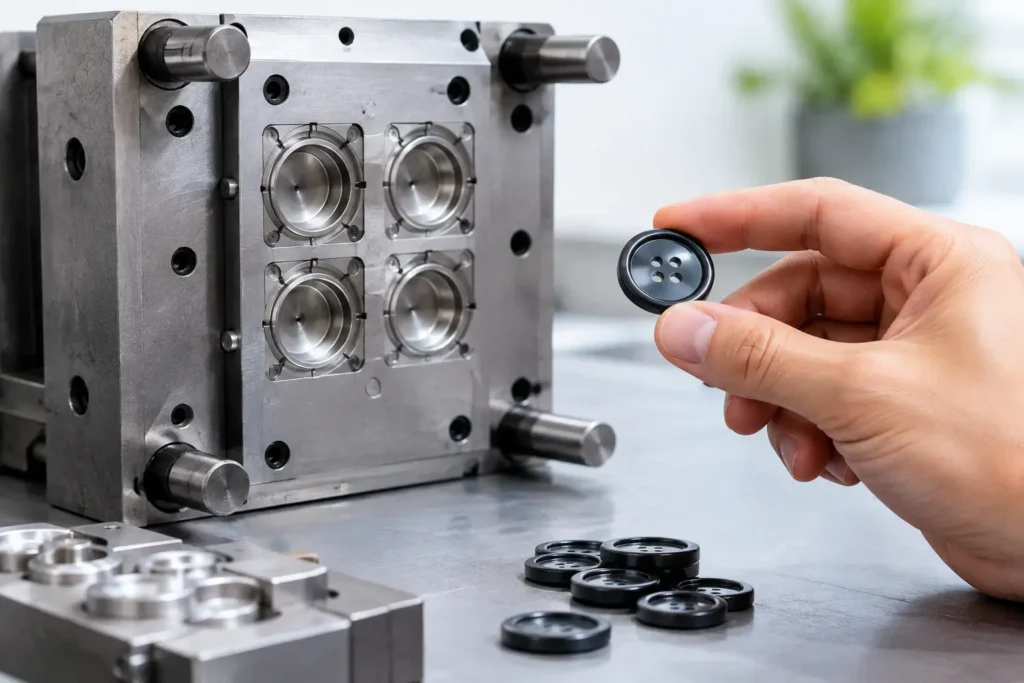
A button can look correct in a concept drawing and still perform poorly in production. Button mold performance is determined by how the chosen material behaves inside the tool, how the button is constructed, and how consistently the process is controlled from approved sample through bulk production. For apparel teams, the practical question is not whether a mold can produce one attractive button. It is whether it can produce the required quantity with stable dimensions, acceptable surface quality, reliable attachment features, and repeatable branding details.
For molded resin and plastic buttons, the mold is central to production performance. For natural materials such as corozo, horn, shell, wood, or metal, tooling and finishing still matter, but the manufacturing variables are different. A production-ready specification should identify the material, size, thickness, construction, hole or shank design, logo treatment, finish, color target, and acceptable variation before tooling is finalized.
What Button Mold Performance Means in Production
Button mold performance is the ability of tooling and process settings to produce buttons consistently within the agreed visual and functional requirements. It affects more than cycle speed. It influences fill quality, edge definition, hole formation, warpage, shrinkage, surface marks, logo clarity, and the consistency of the finished button from cavity to cavity.
A mold that produces sharp samples at a low trial volume may require further adjustment before bulk production. Material flow can change with pigment loading, recycled-content blends, moisture condition, batch variation, temperature, and the selected finish. Small changes are especially visible on high-gloss buttons, pale colors, large flat faces, and designs with fine engraved artwork.
The intended garment use also matters. A decorative shirt button and a large coat button may have different thickness, attachment, laundering, dry-cleaning, abrasion, or impact expectations. These requirements should be discussed as part of product development rather than assumed from the button’s appearance.
Material Choice Sets the Starting Point
The best mold design depends on the material family. Resin and other molded button materials can support controlled shapes, integrated shanks, raised logos, and repeatable color development, but they require attention to flow behavior and cooling. A thin button with a wide diameter can be more difficult to fill evenly than a thicker, smaller design. Deep recesses, sharp internal corners, and abrupt changes in wall thickness can increase the likelihood of uneven filling or distortion.
Thermoset and thermoplastic materials do not behave identically, so a visual reference alone is not enough to select a process. The desired look may be achievable in more than one material, but the production trade-offs can differ in gloss, edge sharpness, color tolerance, weight, scratch visibility, and tooling approach.
Natural materials introduce another type of variation. Corozo, horn, shell, and wood have grain, density, natural color, and surface characteristics that cannot be treated like injection-molded resin. A buyer may request a uniform appearance, but the realistic tolerance must be reviewed against the material selected. Material claims, recycled content, sustainability statements, and supply documentation should also be confirmed for the specific material and order, rather than carried over from a previous development.
Tool Geometry Affects Appearance and Function
A button tool must allow the material to enter, form, cool or cure as required, and release without damaging the part. The visible face often receives the most attention, but the back construction is equally important. A four-hole button needs holes that are clean, correctly positioned, and suitable for the garment sewing method. A shank button needs a shank geometry that supports the intended attachment and does not create avoidable stress points.
Fine logos require realistic review before tooling. Very thin lines, small lettering, shallow debossing, and tightly packed artwork may lose definition after molding, coating, polishing, plating, or finishing. Raised elements can be visually strong but may wear differently from recessed marks. Laser marking can offer an alternative for certain materials and designs, although the result depends on material response, contrast, artwork, and surface finish.
Parting lines, gates, ejector locations, and draft angles are manufacturing details that should be considered early. They may be discreet, but they cannot always be eliminated. A design that provides a suitable area for these features will usually offer better production control than one that requires every surface to remain visually uninterrupted.
Thickness and Shrinkage Need Allowance
Nominal size is only one part of the specification. Thickness, rim profile, hole diameter, shank height, and underside clearance can affect both the look and the way the button sits on the garment. Molded materials may shrink as they cool or cure, so tool dimensions are calculated with the material’s expected behavior in mind.
This is why a target measurement should be paired with an agreed tolerance. Requesting an exact dimension without recognizing normal material and process variation can create unnecessary rejection risk. Conversely, a tolerance that is too broad may affect sewing equipment settings, buttonhole fit, or garment appearance. The appropriate range depends on the button size, construction, material, and end use.
Sampling Is Where Assumptions Become Specifications
A physical sample is the most useful checkpoint for button mold performance. It allows the product developer to assess more than color and shape. The team can inspect logo readability, face consistency, edges, hole quality, shank form, thickness, feel, and the interaction between the button and the garment fabric.
NZXTRIM typically treats sampling as a technical review stage, not simply a presentation stage. The approved sample should identify the production version as clearly as possible: the material, color reference, finish, dimensions, logo method, construction, and any accepted natural or process-related variation. If a sample is hand-finished or produced through a development method that differs from planned bulk production, that distinction should be made clear before approval.
Color requires particular care. A Pantone reference can guide development, but final color perception changes with material base, gloss level, texture, lighting, button thickness, and adjacent fabric. For translucent, pearlescent, marbled, or recycled-content materials, variation may be inherent to the selected look. Color tolerance should therefore be agreed using actual button samples where possible, not only a digital image or code.
Process Control Protects Bulk Consistency
Once the tool is approved, performance depends on repeatable production conditions. The material preparation, pigment or additive ratio, molding temperature, pressure, cooling or curing time, trimming, polishing, and finishing sequence can all affect the final result. A minor process shift may show up as sink marks, flash, short fill, inconsistent gloss, dimensional movement, or logo softness.
Quality review should focus on the characteristics that matter to the garment program. For one order, that may be consistent hole formation and size. For another, it may be plating appearance, an engraved logo, a matched color family across several sizes, or a smooth finish against delicate fabric. The inspection plan should be aligned to the approved sample and written specification, including how visual variation will be judged.
If performance testing is needed, define the intended use and evaluation method early. Testing scope, laboratory requirements, pass criteria, and applicable documentation must be confirmed for the specific button material, finish, garment category, market, and supply route. A general material description should not be treated as proof that a particular finished button meets a buyer’s program requirements.
MOQ, Lead Time, and Tooling Trade-Offs
Tooling investment is often influenced by the expected order volume, number of sizes, number of cavities, material, and complexity of the design. A multi-cavity approach may support higher output, but it also requires careful cavity balance and quality control to maintain consistency. For lower-volume programs, the most economical route may differ from a high-volume core style.
Changes after tooling begins can affect cost and timing, particularly when they alter the button diameter, thickness, hole layout, shank construction, or logo artwork. A color change may be simpler than a structural change, but this depends on the material and process. MOQ and lead time should be confirmed after the design, material, tooling status, finishing requirements, quantity, and delivery plan are known.
The practical objective is not to over-engineer every button. It is to select a material and construction that can deliver the required appearance and use performance at a realistic production level. A clear specification, a representative physical sample, and early discussion of garment use give the mold the best chance to perform as intended when bulk production starts.