
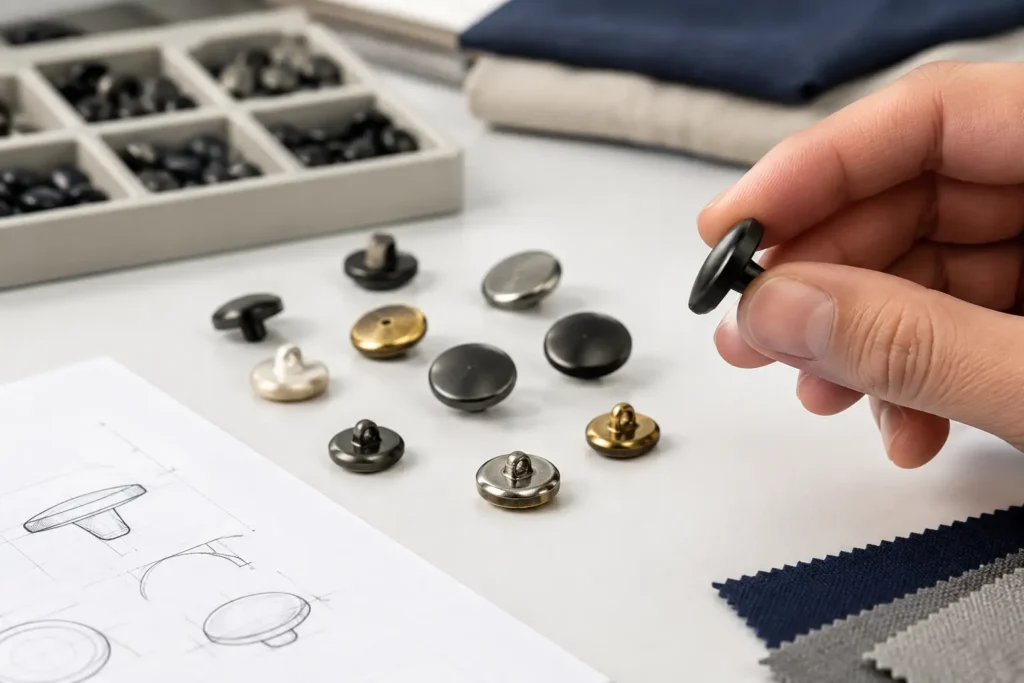
A shank button may look like a small design detail, but its specification affects garment assembly, button stance, durability, color consistency, and bulk cost. Knowing how to specify shank buttons means defining more than the visible face: the buyer must also state how the shank is formed, attached, sized, and approved for the intended garment.
For fashion programs, uniforms, outerwear, and tailored garments, a visual reference alone is not a production specification. It can communicate style, but it does not tell a factory which material, shank geometry, attachment method, tolerance, or quality checks are required. A clear brief reduces sampling rounds and gives the garment factory a button that can be sewn consistently on the production line.
Start With the Garment and End Use
Specify the garment before specifying the button. The same 20 mm shank button can perform very differently on a lightweight blouse, a wool overcoat, a denim overshirt, or a workwear jacket. Fabric thickness, buttonhole type, wash process, expected pulling force, and the machine or sewing method all influence the appropriate construction.
State where the button will be used: center front, cuff, collar, pocket flap, waistband, epaulet, or decorative placement. Also identify whether it is functional or ornamental. A functional closure needs sufficient clearance between the button back and garment fabric so that it can pass through the buttonhole and sit correctly when fastened. A decorative shank button may allow more freedom in profile, but it still needs an attachment that will not interfere with pressing, lining, or wear.
The product team should provide the intended garment fabric or a representative swatch whenever possible. A shank height that suits a thick melton wool may leave a loose, unstable appearance on a fine woven shirt. Conversely, a very low shank can be difficult to sew onto a padded or multilayer garment.
Define the Face Material, Shape, and Size
The visible button face starts with material. Common options include metal, resin, corozo, horn, shell, wood, ceramic, and specialist material combinations. Each material has different limitations for surface detail, edge definition, color development, weight, tooling, and shank integration.
A material choice should be supported by the required appearance and production conditions. For example, a plated metal button can provide a crisp emblem and substantial weight, while a dyed corozo option may suit a natural-looking tailored program. Resin can support a broad range of colors and molded forms, but the achievable finish and logo detail depend on the selected resin system and button geometry. Claims relating to recycled content, material origin, sustainability, or performance should be verified for the specific material and order rather than assumed from a general category name.
State the finished diameter in millimeters and, where relevant, Ligne. One Ligne equals 0.635 mm, and many apparel teams still use Ligne for button sizing. If both are used, identify the controlling measurement, such as 18L / 11.5 mm nominal. Also specify the acceptable size tolerance if the garment pattern or buttonhole is particularly sensitive.
Describe the face profile rather than relying only on a photograph. Useful details include flat, domed, concave, rimmed, beveled, recessed center, crest shape, or irregular organic form. Include target thickness at the center and edge where this affects fit or appearance. A large high-profile button can look appropriate on outerwear but may pull a lightweight placket forward.
Specify the Shank Construction Clearly
The shank is the loop or attachment point on the back of the button through which thread passes. It must be specified as a construction feature, not treated as an invisible default.
First, identify whether the shank is integral or separately attached. An integral shank is molded, carved, or formed as part of the button body. A separate shank may be a metal wire loop, stamped eye, riveted fitting, or other component attached during manufacture. The choice affects appearance, strength, production route, and material options.
Then define the shank type and dimensions. The most useful dimensions are internal opening, shank height, wire or material thickness where applicable, and the orientation of the loop. The internal opening must accommodate the intended sewing thread and sewing method. The shank height, measured from the garment-facing base of the button to the center or usable opening of the loop, should suit the total thickness of fabric layers.
If the button has a directional logo, state the required shank orientation relative to the face. This matters for crests, letters, animals, and asymmetric motifs. Without that instruction, a shank may be technically sound but cause the logo to sit at an unintended angle after sewing.
For high-use garments, ask the button supplier to review the shank-to-body junction as part of feasibility. A narrow connection may suit a delicate fashion button, while a frequently fastened coat or uniform program may require a more substantial construction. The correct solution depends on material, diameter, button profile, garment use, and expected handling.
Provide Artwork That Can Be Manufactured
Logo requests need production-ready artwork, preferably vector files with defined line weights and dimensions. An embossed crest, engraved wordmark, laser-marked graphic, or debossed border can look very different once scaled to a 15 mm or 20 mm button face.
State the desired logo method, but allow the manufacturer to assess feasibility against the chosen material. Deep engraving may be achievable in one material and unsuitable in another. Fine lines can fill during molding or become visually weak after finishing. For plated or painted details, define the intended color areas and finish, then confirm the result on a physical sample.
Pantone references are useful for resin, coatings, paint fills, and other color-managed finishes, but they are targets rather than automatic guarantees. Surface texture, base material, gloss level, lighting, and batch variation can affect the final appearance. Specify whether the color is a critical approval point and review the approved standard under the lighting conditions relevant to your product review process.
Build a Sampling Plan Before Bulk Production
A good sampling plan separates appearance approval from production approval. An early development sample may confirm size, profile, logo placement, and material direction. It should not automatically be treated as the final reference for bulk production if construction, finish, or color is still being adjusted.
For a custom shank button, the approval sequence often includes artwork review, feasibility confirmation, tooling requirements where applicable, initial physical samples, revisions, and a final sealed reference sample. Keep written records of the approved material, finish, size, shank dimensions, logo artwork, and any accepted cosmetic variation. This becomes the benchmark for bulk inspection.
NZXTRIM can review a concept against button material and construction options, then help convert the selected route into a specification suitable for sampling and production. MOQ, tooling, development timing, and available finishing methods should be confirmed for the exact design rather than estimated from a visual reference.
Set Quality Requirements That Match the Program
Quality requirements should be specific enough to guide inspection. Define the acceptable face appearance, edge condition, plating or coating expectations, logo legibility, shank alignment, and any restrictions on scratches, pits, marks, or visible color variation. If a front-facing button will be packed with other hardware, packaging protection may be as important as the finished button itself.
Where the garment program requires performance assessment, define the relevant test scope early. This may concern shank attachment, finish behavior, laundering, dry cleaning, corrosion exposure, or chemical contact. The suitable method, sample quantity, acceptance criteria, and any certification or documentation requirement must be agreed for the exact button material, finish, garment use, and supply route. A test request should never be assumed to apply across every material or finish option.
Also state the inspection approach for bulk delivery. Some buyers approve against a sealed sample and agreed tolerance range; others require pre-shipment review, third-party inspection, or factory-level quality checks. The practical choice depends on the value of the program, delivery timing, and the consequences of variation at garment assembly.
Include Packaging, Quantity, and Delivery Information
The final specification should state order quantity by size, color, and design, plus any spare-button requirement for finished garments. Identify the packing unit needed by the garment factory, such as bags, cards, trays, or bulk cartons, and note whether face protection or separation is required to limit surface contact in transit.
Give the supplier the ex-factory target date, delivery destination, and whether buttons must arrive before a garment production milestone. This allows sampling, bulk production, inspection, packing, and international delivery planning to be considered as one schedule. A button approved too late can affect garment line readiness even when the component itself is simple.
A production-ready shank button specification gives every party the same reference: the design team sees the intended appearance, the button factory understands the construction, and the garment factory receives a component that can be sewn as planned. The most useful next step is to turn your sketch, reference button, or tech pack into a physical sample before committing the design to bulk production.