
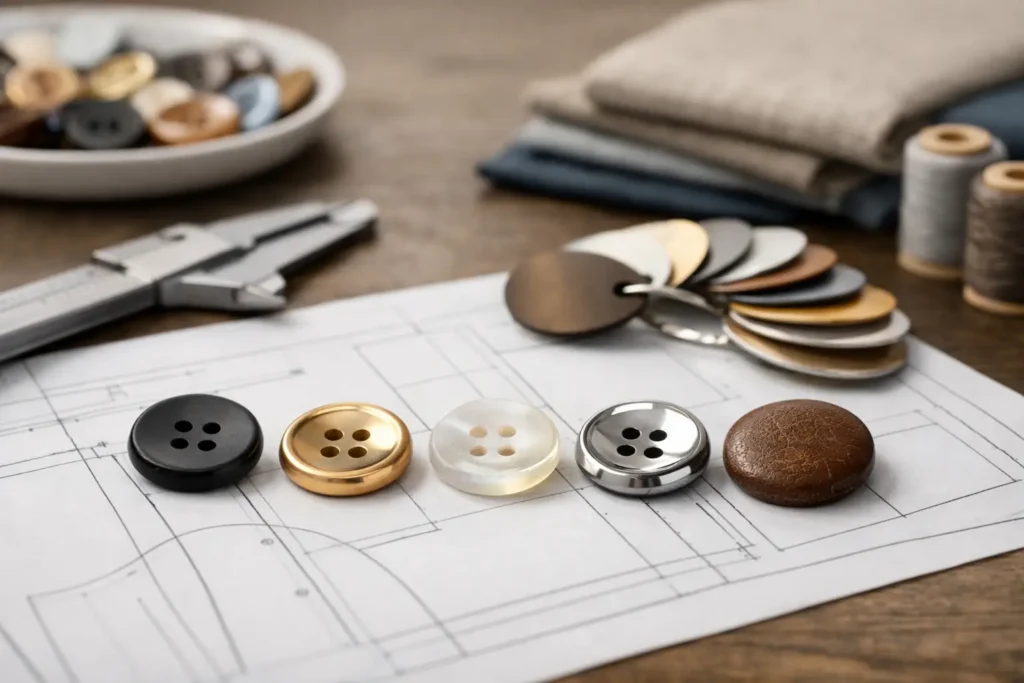
A button can match the approved color chip and still look wrong on the garment. The reason is usually finish. When product teams ask how to specify button finishes, the goal is not simply to choose “matte” or “shiny.” It is to define a repeatable surface standard that a factory can sample, inspect, and reproduce across bulk production.
For apparel brands, designers, and sourcing teams, finish specification protects the appearance of the collection and reduces costly disagreements after goods arrive. It gives the button manufacturer a clear production target while helping your garment factory maintain consistent trim quality from the first sample through final shipment.
Start With the Garment, Not the Button Catalog
A button finish should support the fabric, silhouette, intended price point, and wear conditions of the garment. A high-polish metal button may provide the right statement on a tailored blazer, but it can look overly formal or create unwanted contrast on a washed work jacket. A soft matte resin button may suit cotton shirting, while a ceramic or horn-style finish can add depth to a premium knitwear program.
Start by identifying the visual role of the button. Is it designed to blend into the garment, create a tonal accent, or become a visible brand detail? This decision affects the required gloss level, texture, plating, edge treatment, and logo definition.
The fabric also matters. Smooth satin, fine wool, denim, linen, leather, and brushed fleece reflect light differently. A finish that appears balanced against a laboratory color card may look too bright, too flat, or too dark once sewn onto the actual garment. Whenever possible, evaluate button samples on production fabric under the lighting conditions used for product approval.
Define the Finish in Measurable Terms
Words such as “premium,” “vintage,” “natural,” and “luxury” communicate an aesthetic direction, but they are not enough for manufacturing. A useful button finish specification combines descriptive language with a physical sample, reference images, and production details.
For resin, corozo, horn, ceramic, and recycled buttons, describe whether the surface should be high gloss, semi-gloss, satin, matte, frosted, brushed, tumbled, or textured. State whether the face and back should have the same finish. This is particularly relevant for two-hole and four-hole buttons, where the reverse side may remain visible during wear.
For metal buttons, specify the base material or alloy, plating color, gloss level, protective coating, and any special effect such as antique, brushed, sandblasted, oxidized, blackened, or stone-washed. “Antique brass” is not one universal finish. One version may be dark and heavily distressed, while another may be warmer, cleaner, and only lightly aged. An approved physical reference is the best way to prevent variation in interpretation.
Also define the edge. A polished face paired with a sharp edge produces a different impression from a rounded, softened, or tumbled edge. On logo buttons, edge treatment can affect how clearly lettering and fine artwork appear after plating or polishing.
Set a Gloss Standard
Gloss is one of the most common sources of approval issues because it changes under different light. Terms such as matte and semi-matte are useful, but they should be supported by a retained approval sample. If your program requires close control, ask the factory to state the intended gloss range and inspection method.
This is especially valuable when buttons are produced in multiple batches. A small gloss shift may be acceptable on a natural corozo button, where organic variation is expected. It may not be acceptable for a uniform brand logo button used across several garment styles.
Specify Texture and Pattern Direction
Texture should be described by both appearance and direction. For example, a brushed metal button may require a straight horizontal brush, circular brushing, or a non-directional satin texture. If the direction is not specified, buttons can appear inconsistent when attached to a garment.
For molded resin or recycled buttons, define whether the surface should be smooth, lightly grained, hammered, marbled, speckled, or intentionally irregular. If marbling or recycled-content variation is part of the design, clarify the acceptable range. Natural-looking variation can add value, but uncontrolled variation can make a production lot look mismatched.
Include Color, Plating, and Protective Requirements
Finish and color are closely connected. A translucent resin button can appear different depending on thickness, back treatment, and fabric color beneath it. Pearlized, smoky, tortoiseshell, and marbled effects should be approved as actual molded samples, not only digital renderings.
For plated metal buttons, identify the target plating tone as precisely as possible. Common instructions include bright nickel, dull nickel, light gold, antique gold, gunmetal, black nickel, and antique brass. Add a physical reference or approved sample whenever the tone is brand-sensitive. Screen colors and photographs cannot reliably represent metallic warmth, darkness, or reflectivity.
Protective coatings should be discussed early if buttons will face frequent washing, dry cleaning, abrasion, sweat exposure, or outdoor conditions. A clear topcoat can help preserve appearance, but it may alter gloss or make a dark finish appear slightly deeper. The right choice depends on the material and intended garment care label.
Build Sampling Into How to Specify Button Finishes
The most dependable finish specification includes a controlled sample process. Begin with a development sample to confirm shape, material, color, logo, and general finish direction. After feedback, approve a final sealed sample that becomes the reference for bulk production.
The sealed sample should be labeled with the button style number, size, material, finish description, color or plating reference, logo version, and approval date. Keep one retained sample with your brand and one with the button factory. This provides a shared standard if questions arise during production or final inspection.
For complex finishes, consider a small finish board showing several approved options side by side. This is useful for antique plating, brushed effects, marbled resin, horn imitation, and recycled materials, where normal manufacturing variation may occur. The board helps distinguish acceptable natural variation from defects.
Do not approve only the face of the button. Review the back, holes or shank, rim, logo depth, plating coverage, and any cutting or molding marks. A button may look correct from the front but fail garment inspection because of rough edges, blocked holes, uneven coating, or sharp shank points.
Set Realistic Tolerances for Bulk Production
No factory can produce every button with zero variation, especially with natural materials and hand-applied effects. Strong specifications identify what must remain consistent and where variation is acceptable.
For example, a uniform resin button may require close consistency in color, gloss, diameter, and logo placement. A genuine horn or corozo button may allow slight changes in grain, tone, and natural markings, while still requiring the same general finish family and polished quality. Recycled buttons may show visible flecks or tonal movement because of the input material. If that variation is part of the product story, define it as an approved characteristic rather than treating every difference as a defect.
For metal finishes, specify concerns that cannot be accepted, such as exposed base metal, pinholes, uneven plating, excessive dark spots, scratches visible at normal viewing distance, or inconsistent logo definition. It is also helpful to state the viewing condition for cosmetic inspection. A practical standard might be inspection under normal indoor light from a defined distance, rather than extreme magnification that does not reflect how a customer sees the garment.
Match Testing to the End Use
A finish is only successful if it remains appropriate after the garment is worn and cared for. Testing requirements should reflect the product category. Uniform buttons, workwear hardware, children’s apparel, outerwear, and premium tailoring may require different testing plans.
Discuss wash testing, dry-cleaning resistance, salt spray or corrosion testing for metal components, abrasion resistance, and color transfer risks where relevant. If a button will be garment dyed, enzyme washed, stone washed, or subjected to a special finishing process after sewing, provide that information before sampling. Garment finishing can dramatically change button color, plating, shine, and surface condition.
Buttons should also be checked for functional performance. Holes must remain clear, shanks must withstand attachment, and edges should not damage delicate fabric. A visually attractive finish has limited value if the component creates sewing problems or fails during wear.
Give the Factory a Complete Production Brief
A practical button finish brief does not need to be complicated, but it should be complete. Include the button material, size, shape, attachment type, artwork, target color or plating, surface finish, edge treatment, approved sample reference, garment use, care process, order quantity, and delivery deadline.
Clear production information allows the manufacturer to select the correct mold process, polishing method, coating, plating route, and quality-control checkpoints. It also reveals potential trade-offs early. For example, a very deep matte finish may reduce logo sharpness, while a highly polished metal surface can show scratches more easily during sewing and packing. Finding the right balance before bulk production is faster and more cost-effective than correcting a finished order.
At NZXTRIM, finish development is treated as part of button engineering, not a final decorative step. The strongest results come from aligning design intent, material behavior, sampling standards, and bulk inspection before the production schedule begins.
A well-specified finish gives every team the same reference point: your designer sees the intended look, your garment factory receives a workable trim, and your supplier has a clear standard to manufacture at scale. Start with the garment, approve a physical sample, and document the details that matter most to your brand.