
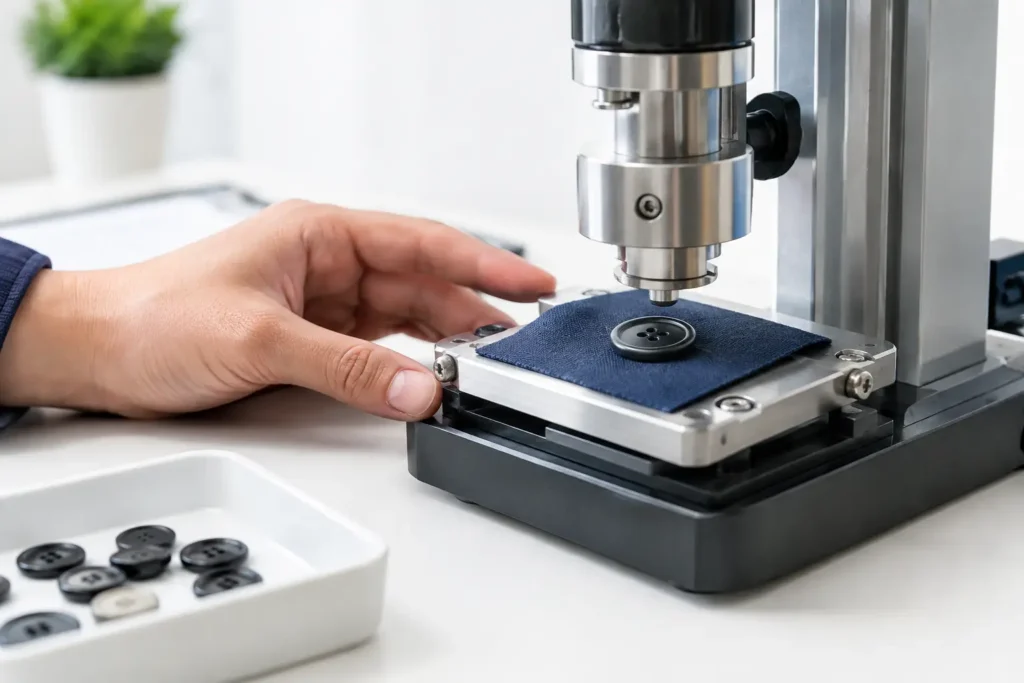
A button can look correct on a presentation sample and still fail once it is attached to a garment, washed repeatedly, pressed, packed, and worn. Knowing how to test button durability means evaluating the complete button-and-garment system, not only the button material. The right test plan should reflect the intended garment, care method, attachment process, and likely wear conditions before bulk production begins.
For apparel teams, durability testing is most useful when it starts with a clear specification. Define what must remain acceptable after use: attachment security, surface appearance, color retention, logo legibility, edge condition, and functional performance. A dress shirt button, a heavy outerwear shank button, and a workwear fastener face different stresses and should not be assessed against the same assumptions.
Start With a Production-Ready Button Specification
Before testing samples, confirm that the design is ready to manufacture. A visual rendering can communicate the intended look, but it does not establish performance. The production specification should identify the button material, size or Ligne, thickness, hole or shank construction, finish, logo method, color target, and the garment fabric or product category.
This matters because a small change in construction can alter durability. Enlarging sew holes may improve sewing efficiency but reduce material around the holes. A deeper engraved logo may be visually stronger but can create a thinner section in a resin or natural-material button. A plated metal finish may require a different review process than a dyed corozo button. The correct choice depends on the design and end use.
Also define the acceptable appearance before testing starts. Decide whether minor surface variation is acceptable, particularly for horn, shell, wood, corozo, or recycled-content materials where natural or batch variation may occur. Without agreed reference samples and tolerance expectations, a test review can become subjective.
Test the Button as Attached to the Garment
The most common durability failure is not a button breaking on its own. It is a button becoming loose, pulling through the fabric, cutting thread, rotating incorrectly, or damaging the garment around the attachment point. For that reason, test sewn garment panels or finished sample garments whenever possible.
Use the intended fabric, interfacing, thread, stitch count, button stand, and sewing method. A button that holds securely on a dense twill may behave differently on lightweight poplin, knit fabric, coated fabric, or a padded outerwear placket. For shank buttons, check whether the shank height allows enough clearance for the garment thickness without placing constant strain on the attachment thread.
During an attachment review, examine whether the button sits flat, whether the thread path is clean, and whether repeated fastening causes distortion around the buttonhole. If the garment team plans to use automated sewing, include trial pieces made under the expected sewing conditions. Attachment quality is a shared responsibility between button construction and garment assembly.
Check Pull, Twist, and Fastening Stress
A useful practical assessment applies controlled force in the directions the button will experience in wear. Pull the attached button away from the garment face, move it side to side, and twist it gently around its attachment point. Observe the button, thread, fabric, and buttonhole rather than looking only for a complete break.
For a two-hole or four-hole button, inspect the material between the holes and the outer edge of each hole. For a shank button, inspect the shank-to-body junction, which is often the highest-stress area. For snap-style or specialist constructions, evaluate the assembled component and the surrounding fabric reinforcement.
Repeated buttoning and unbuttoning is equally relevant. A button may pass a simple pull check but show abrasion, snagging, chipping, or edge wear after repeated movement through a tight buttonhole. Test with the actual buttonhole size and construction. If buttoning feels excessively tight, changing the buttonhole may be preferable to reducing the button size or thickness.
Match Exposure Tests to the Care Label and End Use
Wash exposure should reflect the garment’s expected care route. A fashion blouse intended for gentle laundering needs a different evaluation from uniforms, denim, children’s apparel, or industrial workwear. Include the planned detergent, wash temperature, cycle intensity, drying method, and number of cycles in the internal test brief.
After exposure, review the button for cracking, warping, swelling, delamination, corrosion, surface scratches, dullness, dye movement, or changes in logo definition. Then recheck the attachment. Wash movement can weaken sewing thread, affect fabric stability, or expose stresses that were not visible on an unworn garment.
Material selection determines what to watch most closely:
- Corozo, horn, shell, and wood may require review for moisture response, natural variation, edge condition, and surface finish changes.
- Metal buttons should be assessed for finish wear, scratching, corrosion risk under the intended care route, and the integrity of the shank or back construction.
- Resin and polyester buttons should be reviewed for cracking, chipping, heat response, and possible changes in printed, engraved, or filled logo details.
- Ceramic buttons need careful assessment of chip resistance, glaze condition, weight, and attachment construction.
- Recycled or specialist materials should be evaluated based on the specific formulation and finished button construction. Recycled content does not predict durability on its own.
Dry-cleaning exposure, high-heat pressing, garment dyeing, enzyme washing, stone washing, bleach exposure, or coating processes should only be included when they are relevant to the actual program. They can materially change the risk profile and should be disclosed before sample development.
Review Surface Finish, Color, and Branding Details
Durability is not only about whether a button remains attached. A button that stays in place but loses color, finish, or logo clarity may still be unacceptable for the collection.
Compare tested samples with the approved control sample under consistent lighting. Review Pantone-matched colors, painted details, laser marks, debossed logos, plating, lacquer, and resin fills. Assess both the garment-facing side and the reverse, since back-side wear or finish transfer can affect the garment fabric.
For custom logos, consider how the marking method interacts with the material. Laser marking can produce a different visual depth and contrast on different substrates. Engraving and debossing remove or displace material, so depth and line width need to suit the button’s thickness. Filled details may add color definition but introduce another finish element that needs exposure testing.
Color tolerance and finish consistency should be agreed from physical samples, not solely from a digital image. Batch-to-batch variation may need additional review for natural materials, hand-finished effects, and certain color developments.
Use a Sample Plan That Separates Design Approval From Performance Approval
A single approved sample is rarely enough for a meaningful durability decision. Separate the process into visual approval, attachment trial, exposure trial, and final pre-production review. This keeps a good-looking concept sample from being mistaken for a fully verified production specification.
Record the sample version, material, construction, finish, garment fabric, sewing details, care exposure, and observations. Photographs taken before and after testing help the team compare subtle changes in sheen, shape, and logo appearance. If a failure occurs, identify its likely source before changing several variables at once.
For example, if a shank separates, the solution may involve shank geometry, body thickness, material choice, attachment thread, or sewing tension. If a hole button cracks near the hole, the issue may be hole spacing, button thickness, material behavior, or excessive stitch tension. A controlled revision is faster and more informative than restarting the design without a clear cause.
Set Pass Criteria Before You Review the Results
Pass criteria should be written in the language of the garment program. They may include no visible cracking, no sharp edge formation, no unacceptable finish loss, no logo damage beyond the approved tolerance, no attachment failure, and no staining or damage to the garment fabric. The criteria should also state which changes are acceptable, such as minor natural-material variation or limited surface wear that suits the intended aesthetic.
Where a buyer, retailer, market, or product category requires third-party laboratory testing, confirm the required scope early. The applicable method, sample quantity, conditioning, reporting format, and acceptance limits depend on the specific program. Do not assume that a material commonly used for buttons will meet every requested requirement in every construction.
NZXTRIM can support custom button sampling and quality review by working from the intended material, design, garment use, and care route. The earlier those details are shared, the easier it is to identify practical construction trade-offs before bulk production.
A durable button is not simply the hardest material or the thickest shape. It is a button specified for the garment, attached correctly, reviewed under realistic conditions, and approved against criteria the production team can actually inspect.